May 10, 2018

Orchid 201

May 2, 2018
I think I have FINALLY figured out my Orchid!

So, a little back story. Whenever my husband buys my flowers, it's usually something I have to keep alive. I do well with my garden outside, but not particularly all that well with indoor flowers, that most likely need to be repotted if they are going to survive a tiny bit longer than a week...Anyway, in March or April of 2014 (I can't believe it's been four years!), Scott bought me an orchid. I've almost killed it at least twice, but I have always managed to bring it back to life. I've repotted it at least 3 times and have never seen in rebloom.

But guess what? It's still alive!! Thriving actually. It recently grew a new leaf and another one is growing! It is also growing a lot of new roots that are trying to grow through the pot...literally. I'm crossing my fingers that it will produce a shoot this fall so we can see some flowers. (I honestly don't even remember what color they are. I think maybe yellow/purple?) You can check out Orchid 101 here and see what this baby looked like back in February of 2015. (Took me long enough to figure it our, right?!)

Since this orchid of mine is growing and doing so well, I did some googling. According to Google, Orchids go through their growing season in the spring/summer and then after the main growing season will hopefully produce a shoot! Though, I don't know how this will work since they typically grow new shoots from old ones and mine hasn't bloomed since I got it...I guess we will see!

Here are the tricks that are currently working for me:

Adequate Light Source (not too much and not too little):
Orchids are fickle. Seriously... when I first almost killed my orchid, it was because it was getting WAY too much sun and the leaves were burning. (I also may have been over watering..) 

My orchid currently resides on my front room windowsill, facing east. Our window also has a shade screen on it, which helps with Arizona's bright and very hot sunshine. It resides here indefinitely, unless it's in the kitchen after getting watered. This is perfect for my orchid. Morning sun and then bright light the rest of the day.

Watering:
Too much water and it will rot and die. Too little water and it will shrivel up and die. Another happy medium! I water my orchid every Saturday, or once a week. I let the water run for at least 15-30 seconds on each side, making sure the planting medium is nice and wet. I also let the water run over any exposed roots. Don't forget to dump out any excess water! And don't get any water in the center of the leaves! If you do, use a paper towel to get it out.

Pot/Container:
Orchids need a lot of airflow, so you need a pot with holes. They also have plastic containers that you can put your orchid in and then place that in a decorative pot that doesn't have holes. The nice thing about that, is you can change out your pots/container as often as you'd like and it may be easier for future repotting.

My pot has holes and with how my orchid is growing, I may need to break the pot whenever I have to move it to a different one! (Some roots are growing out of the holes!) We will cross that bridge whenever we get there.


Planting Medium:
This may determine how often you water your orchid. My orchid is in this Special Orchid Planting Mix that I found on Amazon. I just repotted my orchid in March, so in a month and a half, it has already grown multiple new roots and new leaves. So, I am going to say this stuff must really be special! The bark is a lot bigger than I was expecting, but it works perfect! And it's growing, so we must be doing something right.

Sheesh! So much work for a silly little plant! But I love them. They are so pretty when they bloom! And I am determined to get mine to bloom again. I've had it for 4 years, so I'm committed. If you have any orchid tricks, please, let me know! I could use a little help!


May 10, 2018


Happy planting! Cheers!


    photo signaturetb2.png

Apr 30, 2018

Sew A Little Seam - Movie Night PJs

Oh my goodness, these Movie Nigh Pajamas by Sew A Little Seam are the BEST! Definitely not just for movie nights, girl's night, lounging around the house or sleeping. They are for everything! (Nobody said you have to wear the top and bottom at the same time! My sister would say I'm not allowed to wear them both...at the same time...outside of the house. But I totally would. )

The pants from the Movie Night Pajamas are seriously my FAVORITE! <3! I love all the cuffs, which means no hemming! I probably wear the bottoms more than I wear leggings, which says a lot because I loooove leggings. I definitely wear them weekly, until they are all dirty and I have to do laundry....

This is a pretty standard pattern with a handful of options. The top has a crew and scoop neck with an option for a placket and long, 3/4 and short sleeve options. Bottoms can have cuffs or hemmed with pants, capris or shorts!

Apr 26, 2018

Me-Made-May 2018


This is the first year that I have officially signed up for the Me-Made-May challenge that was created by Zoe from So, Zo, What Do You Know?. I am super pumped for this! The challenge is in it's 9th year!

You can sign up by hoping over to Zoe's blog and submit your pledge by commenting on her post here. You can be as specific as you'd like to make the challenge personal to you. And you MUST submit your pledge before May 1st!

My Me-Made-May Pledge:

Apr 25, 2018

Hey June Handmade - Halifax Hoodie

Probably one of the worst things about living in Phoenix (other than the super hot summers) is the lack of seasons. It was almost 100 degrees today...and it's April! Spring and Fall don't exist here. It's just hot and hotter (and cold but to everyone else, it's really not that cold), which can sometimes be a little depressing. But from November (ish) to March (ish) we can wear cardigans and light jackets all the time! And do you know what is perfect for that? The Halifax Hoodie by Hey June. Love it! I've acquired so many patterns that I have to look through them for a refresher so I can make more of my favorites!

This is a pretty straight forward sew and it comes with a few different options. This one is my favorite! A simple, yet classy sweater style. There is also options for a pullover hoddie (or cowl neck!) with a hangaroo pocket, and the classic zip-up hoddie.

Don't mind how skinny I look in these photos... I've since been doing Crossfit (more about that later!) and I've had a baby! (I'm a little behind, I know I know...) <3

If you've made any version of the Halifax, I'd love to see! Link it in the comments below or tag me on instagram! @tmcreates


(Photo cred to the amazing Annie)

Happy sewing!

Cheers!
    photo signaturetb2.png

Apr 24, 2018

Petite Stitchery & Co - Sweet Tea

Petite Stitchery & Co has been releasing new patterns like crazy! It's ridiculous and awesome all at the same time. The designers must be super busy! I just discovered them a few months back (they don't have a super huge following compared to some other pattern companies but they have some really really cute patterns!) and was able to join their group of testers. Testing patterns is a slightly stressful but really fun experience. (Probably more stressful for the designer!) 

Petite Stitchery & Co tends to release patterns on Thursday and this Thursday they are releasing seven new patterns! I had the opportunity to test the new Women's Sweet Tea. I am super excited for this! It's a swing dress & top with a modest cold shoulder (that's right, it covers garments and can be easily modified for the sleeve opening to be a little bit lower! Hooray for modest LDS sewing!), bottom of the sleeves tying in a bow and it comes in sizes XS-3X and three sleeve lengths. #swoon! You can check out the rest of their patterns here!

Here is my pretty little Sweet Tea Dress. Photo cred to my good friend Annie (I make her take all my pictures! <3) Don't mind my crazy hair in some of the photos. It just happened to be super windy the whole weekend! Which isn't the greatest for a swing dress!


Remember, if you make one of these beauts, please link it in the comments below so I can see! Or tag me on instagram! @tmcreates

Tip! When you are sewing the sleeve, it makes it a million times easier if you can get really close to the edge of the previous stitch line. This took me a few tries before I figured it out. (Light bulb moment!) I kept trying to keep the seam allowance instead of trying to get super close to the edge. But this makes it turn so nicely! I sew the V with my sewing machine first and then stitch the rest of the sleeve up with my serger. Trim more if you need to. :)


Cheers!
 

 photo signaturetb2.png

Apr 8, 2018

Petite Stitchery & Co - Emerson V-Neck


Isn't this cute?! I had the chance to help test the Emerson Top for Petite Stitchery & Co. (They have so many cute patterns over there! They also just released a handful of super cute patterns for women and girls. Go take a looksie!) Pattern testing is fun but can be a little stressful - depending on how quick the turn around time is for fit and final photos. But I love it!


The pattern is a semi-fitted v-neck (front and back!) with multiple flounce and plain sleeve options.


The flounce sleeve options make me a little nervous, only because I'm not quite sure if I can pull it off. Nevertheless, one of these days I'll attempt it before I make up my mind completely. Here is the front and back view. It also has a slight curved hem (that I love to hate since hemming curves aren't my favorite). 

Fabric is a super soft french terry from So Sew English. (I am seriously obsessed with there fabric. I recently ordered like 8 or 9 yards...and I really don't need any more fabric...Just don't tell my hubby!)


I also made a new Watch Me Sew video on YouTube. Still figuring all that out, but you can at least watch me sew the majority of this gem (I accidentally skipped the hemming, sorry!). See below or click here!


If you sew up one of these, link it to me in the comments so I can take a peek! Happy sewing!

Cheers!
    photo signaturetb2.png

Mar 11, 2018

Cleaning the Sewing Room

Oh my goodness, it is about time that I get my sewing room somewhat organized! It seriously looks like a tornado came in and threw all my fabric all over the place. A little ridiculous, I know, and it really is about time, especially now that it's 2018 (still can't believe it!).

So, I'm attempting a new initiative (this may be the incorrect word choice, but whatever). I love to sew and make things, yes. My husband has been all about those youtube channels (Dude Perfect and Demolition Ranch mainly) where you are just watching people do stuff, i.e. shooting stuff and trick shots. So why not watch me sew, right?! Haha...maybe.

My birthday was yesterday (yay!) and he got me a GoPro so I can start taking all sorts of fun videos! We are going to try this out and kind of just see what happens. I don't really have any idea what I'm doing, so bear with me. To get things started, you can watch me clean up my messy room (technically it's mainly the floor since there is still lots that needs to be done and organized) and then we can start on some killer projects! And I just got some fabric in the mail and we can open that box of goodies together! ๐Ÿ™Œ And maybe I'll get brave and attempt some vlogging, though I have no idea what to talk about...ha! But I'll try to keep all of these organized under the "Watch Me Sew" tab up at the top.


Cheers!
   photo signaturetb2.png

Jan 6, 2018

Family Photos - Hello 2018!


The cutest frown you ever did see!
(Photo cred to my amazing friend Annie!)

The new year came way too fast! And this cute boy is growing even faster! 6 months into motherhood and it feels like it can't get any better than this. Looking forward to the new year and what it will bring!

Cheers!

 photo signaturetb2.png

Dec 12, 2017

Hello World!

I'd like to welcome to the world our little man Maxwell.


Isn't he the cutest?! And so much hair! ๐Ÿ˜  Can you believe it? We are parents! A whopping 8lbs 4oz and approximately 19 inches long. (They measured him at 21 1/4 inches but a few days later at his pediatrician appointment they measured 19?? So we aren't quite sure how long he really was at birth. Maybe he had a really bad cone head and it went back to normal in a few days...)

He is such a bundle of joy and the best baby we could have ever hoped for! <3

...

I started noticing what I was 75% sure were contractions around 9pm on Tuesday night. Max was my first, so I had absolutely no idea what anything was supposed to feel like, and my water didn't break at home, sooooo, yeah. I was texting my girlfriends during this time and they were pretty sure it was contractions. I tried to go to sleep but I just could not get comfortable! And I'm not used to going to sleep before 11, ha! Getting closer to 1am, Scott is starting to get ready for bed and I'm like...I think we need to go to the hospital... (I feel terrible mostly leaving him in the dark, but next baby I will be more prepared and know what's going on!) I call my Dr and he basically tells me to go to the hospital and the worst they can tell me is to go home. 

BTW, for me, contractions felt almost like menstrual cramps in the lower uterus area. More of an annoying pain than anything (at least at that point in time), especially since you can't really shove your fist in your stomach to make it feel a little better...

We get to the hospital around 3am. **If you are planning on delivering a baby and it's your first, I highly suggest you get some food on the way to the hospital! The only thing they will let you eat is ice chips and they are terrible after awhile! Just don't eat a full meal or anything too heavy, in the off chance you need a C-Section.** Luckily for us, I was 6cm dilated, which means we were staying! ๐Ÿ™Œ

It took FOREVER to get out of Triage. I think somewhere around 2 hours. It was terrible and boring. You do lots of waiting and baby monitoring there. Finally, around 5 ish we got to our delivery room. I was debating going natural but then decided against it. And glad I did because it was so much more enjoyable! I was getting super irritable before the epidural. Scott probably wouldn't enjoy dealing with a monster during such a special moment. 


I was not comfortable in the hospital bed AT ALL. I'm almost certain I was having some back labor or my lower back was just hurting because I couldn't sit/lay in a way for it not to. And I had to wait for the anesthesiologist, since the mom with 3+ babies was a higher priority than me...who would have thought? Good thing the best one was on the clock that morning! Totally couldn't feel any contractions with 10 minutes. Life was great! And I wasn't a monster anymore so Scott was now allowed to rub my back or my feet. I couldn't feel any contractions but I could still kind of feel my legs/feet, which probably made changing my dressings easier for the nurses. My water broke within the next 45 minutes. 


My nurse had me use the peanut ball and kept rotating me every 1-1.5 hours. It wasn't very exciting. She also kept asking me if I felt any pressure, which I never did. My Dr FINALLY got there around 9 and guess what, fully dilated! Boom! If he would have stayed, I probably could have delivered Max within the hour, but my doc had one last patient that morning and his office is literally 5 minutes from the hospital, so I didn't object. Besides, I couldn't feel anything anyway. 

Once the nurses got the call that my doctor was going to be there soon, they started prepping me for some pre pushing. Basically to get the baby in position so the doctor can deliver him. And guess what? Max was already crowning! That chunky monkey just slid right down my birth canal! Once my doctor got there, we got the show on the road! I pushed 4 times during each contraction and 4 contractions later...we had a baby! It was such a weird feeling having my belly huge and hard and then all of a sudden it was gone! I could see my belly button! And my belly was so squishy! Hahaha

He was perfect. <3 And still is perfect. We love him so much! And I'm so grateful for my good friend Annie who was able to capture the moment! The stars aligned and everything worked out perfect for her to be there! God is good! And my amazing husband. I love him so much! I couldn't have asked for a better man to be by my side. Our little forever family is growing!! 


Cheers!

   photo signaturetb2.png

Mar 28, 2016

Birthday Surprise!

Ladies and gents, it's time to introduce the newest member of our family! So a little back story first. Scott and I are remodeling our house. We still have quite some time before it's finished. I've been bringing up the puppy idea to Scott off and on for quite a few months. Also, every so often we would go to the pet store to get our puppy fix! It was great. We also decided that once we finish the house, we would get a puppy. Like a little reward!

So my birthday was earlier this month. On one of our weekend excursions to HomeDepot or Lowe's, Scott tells me that... my birthday is coming up and he wanted it to be a surprise....but I should be the one to pick it out. Honestly, I had no idea what he was talking about! I mean, he totally could have been talking about fabric! (Since we all know that I need more!) And then he said I could get a little puppy! So with that, the search began!

It didn't take all too long since I found one that same day. Ha! She's perfect! Her name is Bella. A cute little ball of fluff. She was also meant to be since her birthday happens to fall on our wedding anniversary! (Fate!) She's a cute little Cockapoo (cocker spaniel/ poodle mix). It's said that she will grow up to be between 15-20 lbs, which is perfect for me! Not to tiny, but not huge either. And her coat is apricot, which is just the color I wanted in a pup! <3

House training is super fun though...Bleh! If she leaves the room you are in, she's probably looking for a place to pee. She's 12 weeks old right now though and approximately 5 lbs. Good news is, she is sleeping through the night! Cries all the time when I put her down in her kennel when I have to leave but good news! She hasn't had any accidents! (Knock on wood!!) For being so tiny, she's great at holding her little bladder. Just not so much when she can roam around the house. We make sure all the doors to carpet stay closed!

It's a fun little adventure and she should be with us for quite some time! Enjoy a few pictures of our little furbaby. This also means that it's already time to update our family photos!! Though I'm not so sure how well that would be with a kitty and a pup... <3


 photo signaturetb2.png

Feb 22, 2016

Family Photos 2016 plus Updates!

I really love pictures but I am really bad at taking them with my hubby and me. Mainly, selfies get really old (and pretty awkward!) and I don't always care to ask a stranger to take our picture... (When I strike it rich, I'll just hire a forever photographer!) 

So with that, I plan on getting family photos done once a year, around our anniversary. It works out pretty perfect since it's right around the start of the new year! We just had our 2 year the end of December, which means picture time! This year we decided to include the entire family! ;)

My beautiful friend Annie did our pictures. She is fabulous! Check out her FB page here!

Since this is sort of the start of the new year, I might as well give an update on what has been going on in our lives!

In August of 2015, Scott and I bought a house! We have been hard at work remodeling and renovating. We finally are to the point where we have an almost kitchen! It's really fun to watch it transform, it just takes so darn long. So far we have done all the work ourselves with the help of my dad. So grateful for all his help! I'll be sure to expound more on this in another post with our progress photos!

One of the best things about our house (in my opinion) is the garden! It came with  a really nice sized garden with irrigation already installed. Last year was my first time gardening for real and I had great success! I was a little late in the planting season but this year we will be ready! I'll be sure to update on this years awesome gardening adventure!

We've also been on a few trips recently, Utah over Christmas and we just recently went to California to spend some time at the happiest place on earth! (Disneyland) Hopefully we will start doing a little more traveling together! <3

Work is going well for the both of us, which is always a plus! 

I've also been sewing quite a bit and Scott got me a coverstitch machine for Christmas! (Yay!) Soon I will show you all the things I've been making! I'm also debating if I want to start selling some handmade clothing...

That's basically the jist for now. :)

Anyway, please enjoy some family photos!


Family photos with miss Peanut! <3 Love her to pieces! She was a little but of a turd though...she just wanted to run around and explore, which doesn't work too well when trying to take pictures! Maybe she will be better at taking pictures when she's a little older...

Cheers!
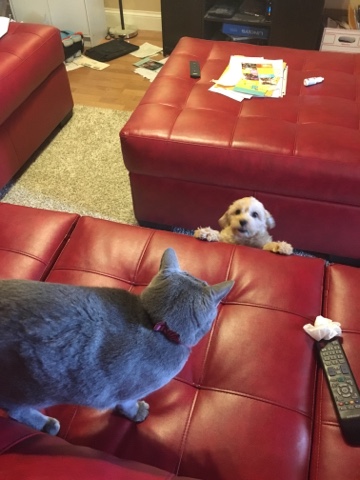
   photo signaturetb2.png

Jan 8, 2016

Favorite Sewing Patterns

Hey guys! The last little while that I've been MIA, I've basically been a busy bee sewing and just having way too much fun! (Okay, let's be real...I haven't been sewing all the time. Maybe in my dreams! <3) My hubby and I also recently bought a house (hooray!) and we have been doing all sorts of remodeling and renovating. (A little intense for house number one...) That basically has been taking up all of our Saturday's. Bless my father's heart for coming up and helping us almost every Saturday for the last few months! Scott and I are really looking forward to it being done though...and having a kitchen again. But more on that later...I'll have tons of pictures to share! I've also been working full time and taking some online classes, so it's been a bit busy over here.

think it's about time that I share some of my favorite sewing patterns. :) These are definitely my go to's. Also, stay tuned because I'll be going a little in depth for each of my favorites! 


1. Layer Me Up - by Patterns for Pirates
2. Peglegs - by Patterns for Pirates
3. Women's Henley - by Patterns for Pirates
4. Bonny Leggings - by Made for Mermaids
5. Raglan - by Patterns for Pirates
6. Raglan add on pack! (The hood seems a little too small for my preference though. I'm going to mash it with the Halifax Hood since it has a great hood size!)
7. Halifax - by Hey June
8. Ginger Jeans - by Closet Case Files
9. Boundless Dress - by Patterns for Pirates 
10. Day Tripper Top - by Shwin Designs

I have a huge handful of other patterns that I have...I just haven't tried them yet. PDF patterns take a lot of time and effort before you can even start sewing! Print the pattern, tape or glue the pattern together, cut out your size, cut out fabric and then we get to sew it all together! Once our house is a little more put together and the dining room table is accessible, I can use that to take some of these patterns together...once I print them...

Also, Made for Mermaids has a bunch of free patterns that were released during 12 Days of Christmas, so head over to their shop and check them out! 


 photo signaturetb2.png
